Step-by-Step
1
Access the Settings Menu
In N8N, click on the three dots in the upper right corner of the interface.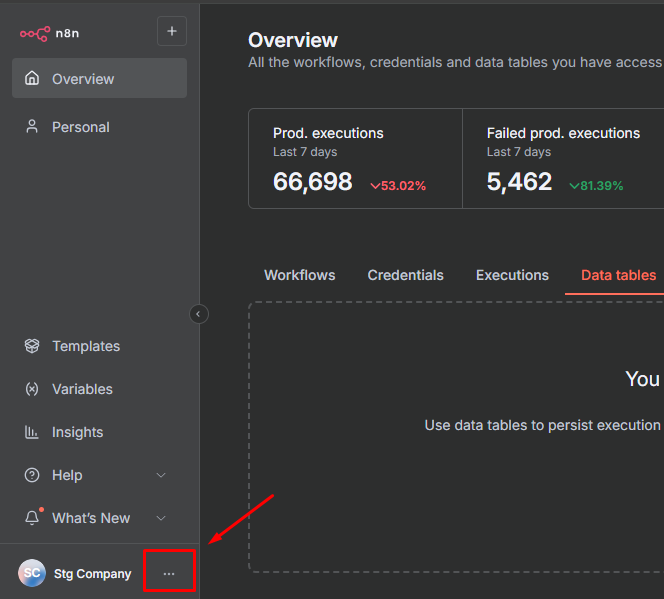
2
Access Settings
Click on Settings in the dropdown menu.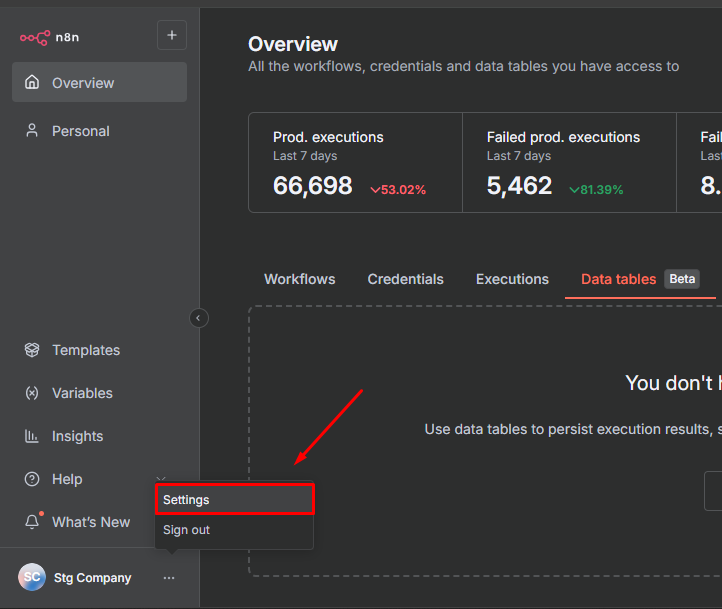
3
Access Community Nodes
In the settings, click on Community nodes to manage community packages.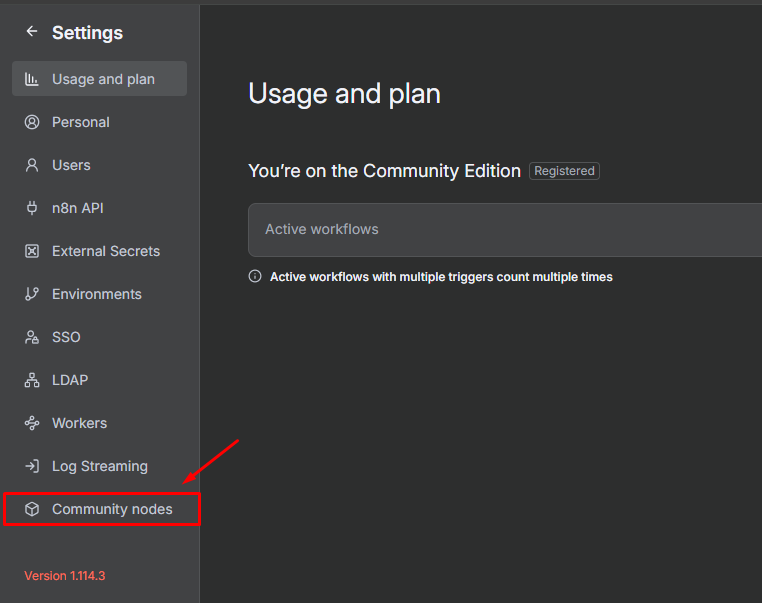
4
Install Community Node
Click the Install a community node button to add a new package.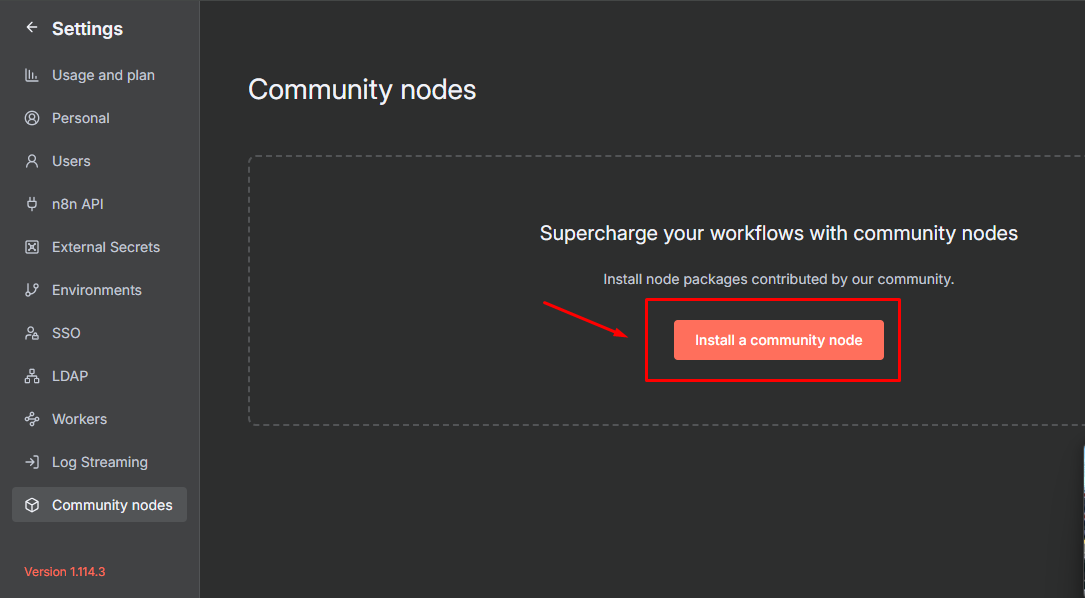
5
Add the Wappfy Package
Enter the Wappfy NPM package name in the installation field and confirm the installation.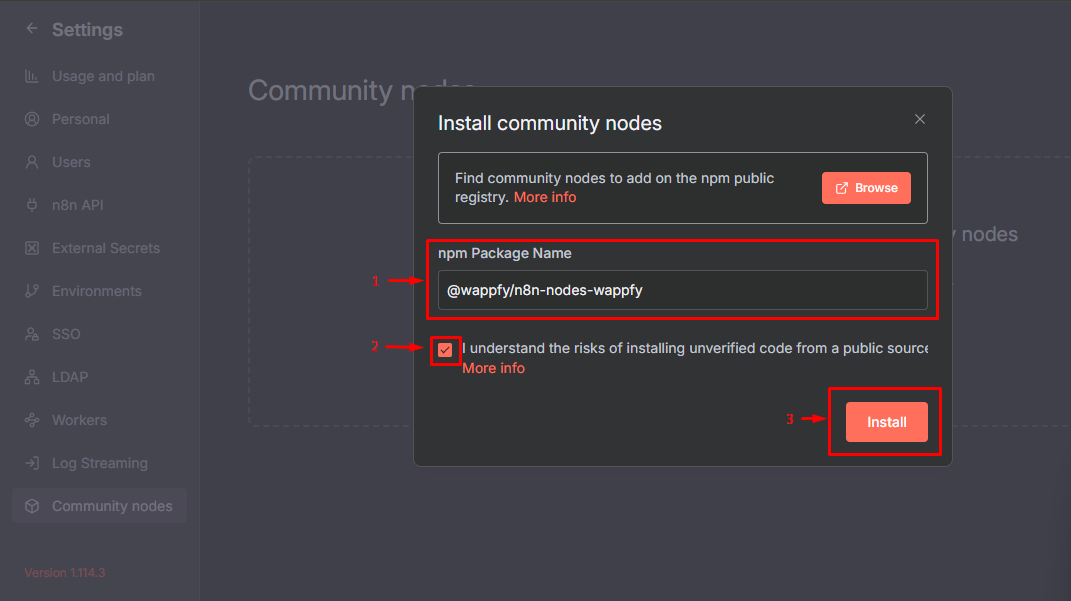
Wait for the package installation to complete. This may take a few moments.
6
Search for Wappfy Node
In your workflows, search for Wappfy in the nodes search bar.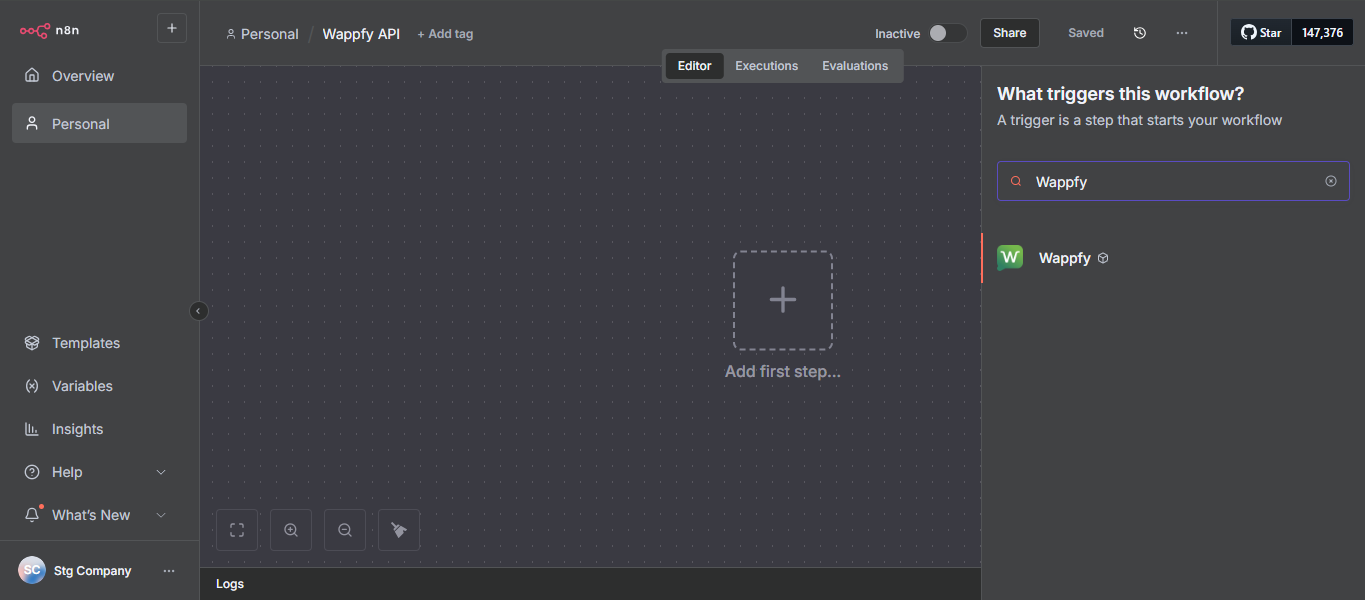
7
Add Node to Workflow
Select and add the desired Wappfy node to your workflow.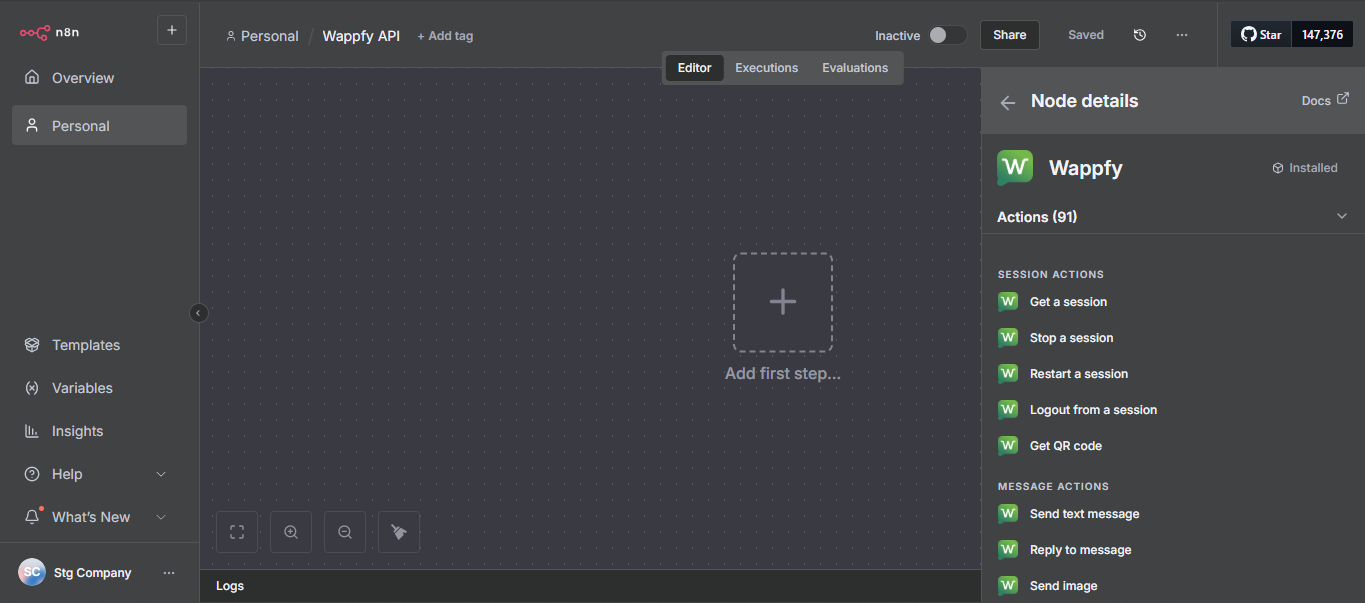
8
Configure Credentials
Configure your Wappfy API access credentials in the added node.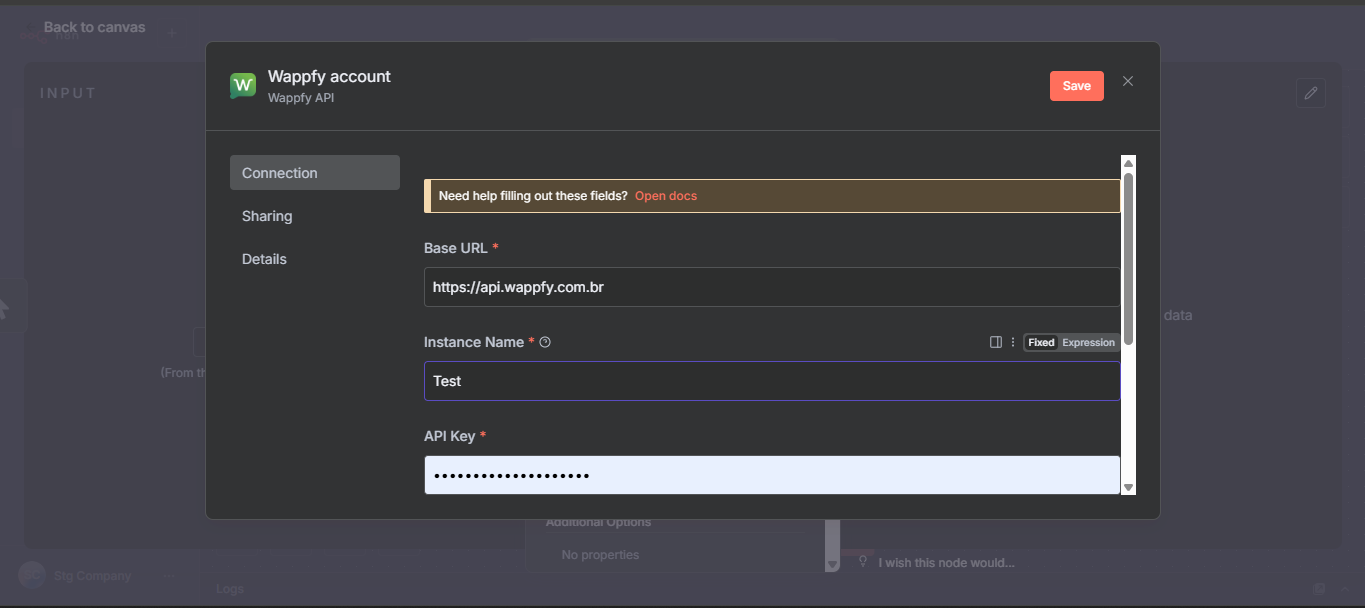
Done! The Wappfy integration is configured and you can start using it in your N8N workflows.
Important Tips
To get your API credentials, access the Wappfy dashboard and navigate to the integrations or API section.